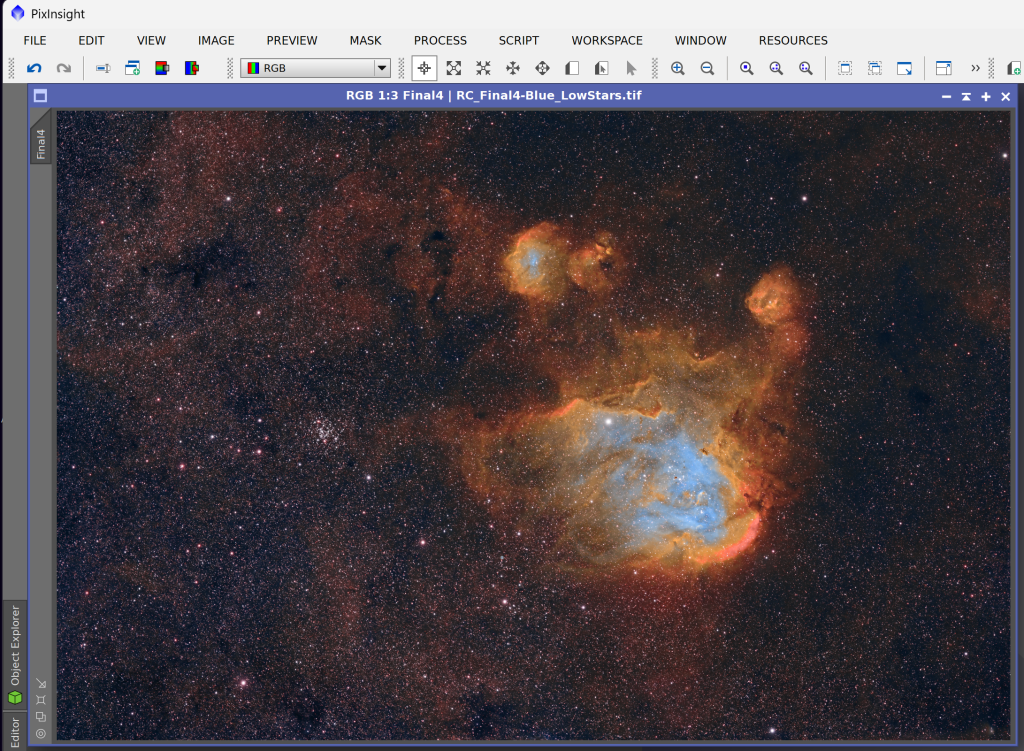
Thanks, everyone, for your interest in my Running Chicken Nebula post! 🙏 Here’s my step-by-step workflow for turning dual-band OSC data into an SHO (Foraxx palette) masterpiece—without a mono camera.
⚠️ Note: You can also stack inside PixInsight, or even do dual-band extraction in APP directly or any other stacking software—but I’ve found this workflow faster, cleaner, and easier to control.
📷 My Gear & Data Recap:
• ASI2600MC Pro (OSC)
• ASKAR 400mm with 0.7 reducer
• ZWO AM5
• 50 × 300s L-eXtreme, 35 × 420s OIII-SII
• Processed APP or PixInsight, Photoshop (optional)
PS: This process will work with any colour Astro camera, any scope with any 2 x narrow-band filters (HA-OIII) and (OIII-SII)
✅ Step 1: Stacking
In APP (or PixInsight if you prefer), stack your two sets of subs separately:
- One master for L-eXtreme data (Hα + OIII)
- One master for OIII-SII filter data (mostly OIII + SII)
- Conduct the gradient removal (I use free standalone tool (Graxpert) for this.
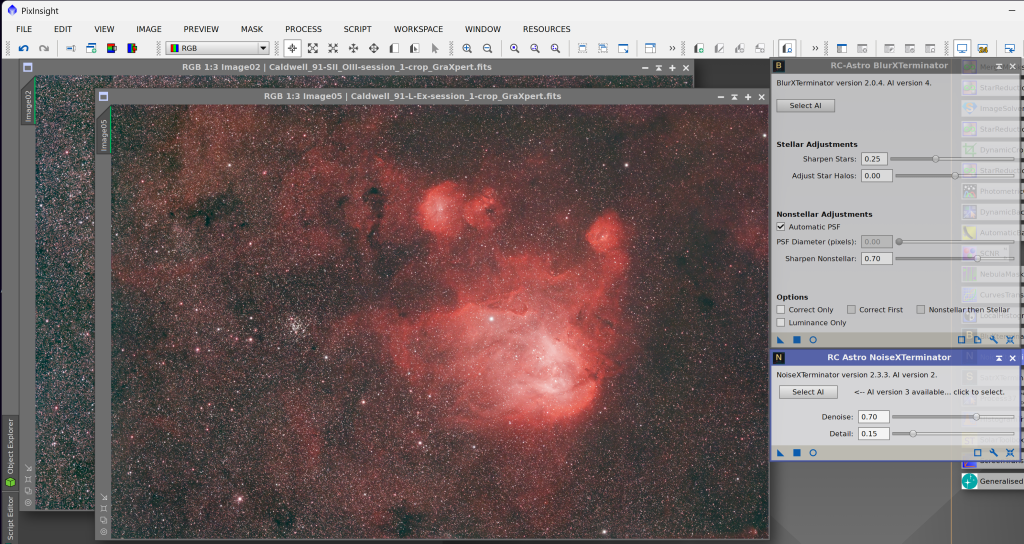
🧽 Step 2: Cleanup
Run NoiseXTerminator &BlurXTerminator (or equivalent tools) on each master.
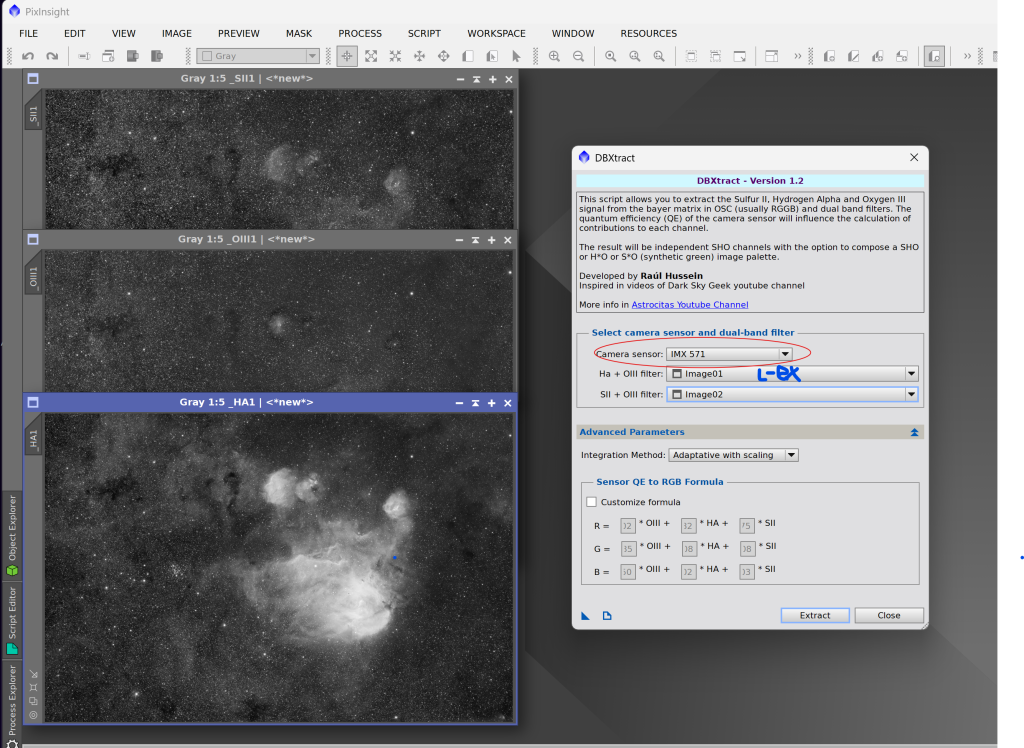
🎛 Step 3: Channel Extraction
⚠️ Do this before stretching to preserve the signal.
In PixInsight, use the DBextract script:
- Extract pseudo Hα, OIII, and SII from the stacked masters.
- You’ll get separate grayscale images for each channel.
📌 Tip: APP can do dual-band channel extraction too—but it’s a bit more manual and slower in practice.
🎨 Step 4: Stretch all 3 images (HA, OIII and SII)
I use a very handy EZ stretch script (Use any tool you’re familiar with to do this step). I find the EZ stretch tool does a good job most of the time.
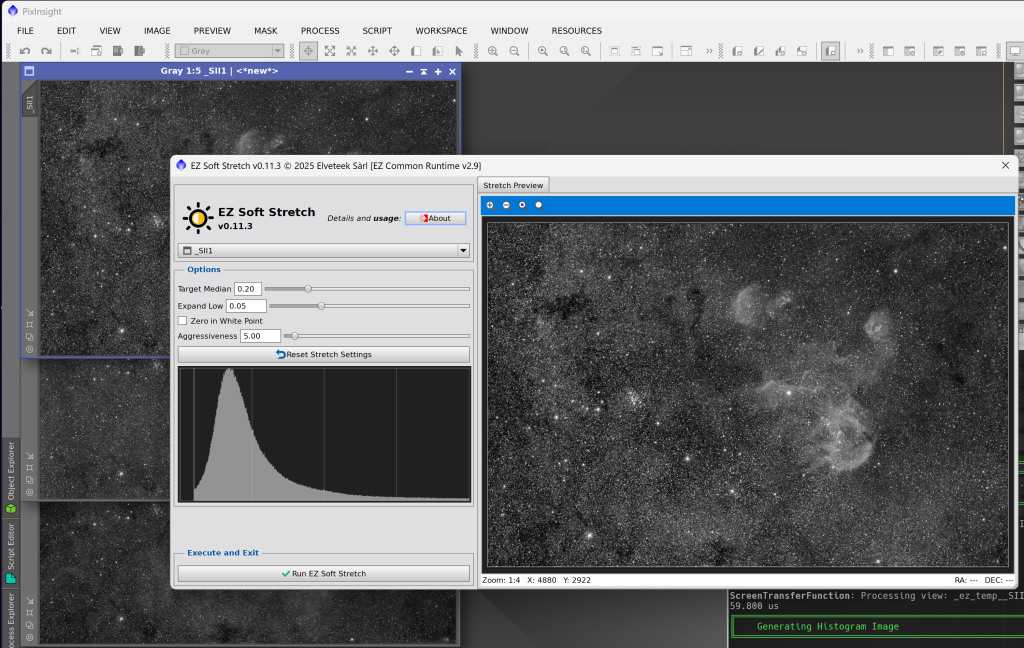
*At this stage, you may also want to consider further cleaning the mono images before combining
🎨 Step 5: Combine with Foraxx Palette
Use PixelMath or the Foraxx script in PixInsight to combine (You can combine into Hubble pallet or any SHO combination):
PS: I remove stars before this step using StarXterminator and combine RGB stars to get more natural colours stars
- Hα, SII, and OIII into the final colour image.

Adjust curves, saturation, and fine-tune. Adjust curves, saturation, and fine-tune.
⭐ Step 5: RGB Stars (Optional)
- Extract stars from your OSC data (short RGB shots or even from the same narrowband).
- Add them back for a natural finish.
✅ Wrap-up
This method keeps your workflow flexible, your colours vivid, and your data clean—even with just an OSC camera and two dual-band filters!
Would you like a video walkthrough next?
Drop a comment or reaction! 🙌
Thank you!
Visit our gallery at Astroman.au
#Astrophotography #OSC #ForaxxPalette #SHO #PixInsight #APP #AstroProcessing #RunningChickenNebula #NarrowbandImaging #ASI2600MCPro #BackyardAstro #DeepSkyAstro